What to check first if any rear lights fail
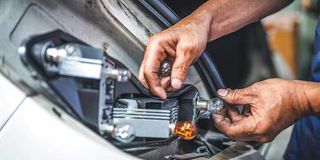
Auto mechanic replacing rear turn signal bulbs.

What you need to know:
- If a whole tail-light cluster fails, it is most unlikely that all the bulbs have blown simultaneously; wiring connections are the probable culprit
- The mounting screws will be easy to undo, but there might also be plastic locator clips which vary in design.
If brake lights or tail lights don’t work, what is the most likely cause? Of all the possibilities, what should be checked first?
Short answer: If one brake light (or rear light) doesn’t work, check the bulb. If lights fail on both sides of the vehicle, check the fuse. If those are okay, and there is no visible problem with the wiring or connections, for brake lights check the switch connected to the brake pedal. The next step is to call an auto electrician.
If a whole tail-light cluster fails, it is most unlikely that all the bulbs have blown simultaneously; wiring connections are the probable culprit. If those are not visually obvious, you need a “multitester” gadget (a must-have for anyone with DIY ambitions in the house or car).


Longer answer: Brake light systems are not technically complex, but they can be awkward to get at. On some saloon cars, all you have to do is open the boot and you will see the back of the tail-light cluster and individual bulbs will be easy to unclip.
On other vehicles, especially station wagons, clusters are usually concealed behind plastic trim with fiddly screws or clips; and in others the whole cluster has to be removed from the outside.

A mechanic replaces a rear lamp to vehicle.
The mounting screws will be easy to undo, but there might also be plastic locator clips which vary in design. You have to figure out, by trial and error, the angles and methods to unhitch those – gently – to avoid damaging them.
Tell-tale signs of a blown bulb can be slightly blackened glass or, on close inspection, one of the filaments will be broken or detached. Wirth a multi-tester, set to “ohms” (the symbol is a distorted U shape) to test “continuity” with one probe on the bulb’s metal body and the other on each of the metal contact points on its base.
Fuses are usually simpler to check; some are located near the bottom of the dashboard panel, behind a hatch. The inside of the hatch lid tells you which fuse does what. Others are in a plastic box in the engine compartment, with a similar map on its lid. Both locations should have purpose-built plastic tweezers for removing and replacing each fuse (otherwise use needle-nosed pliers).
Most fuses have two prongs joined by a metal loop inside their transparent plastic “handles”. If the fuse is blown, that loop will have a melted gap in it. There are usually spare fuses in the fuse box. Replace with a fuse of the same or very similar rating (a small number between 10 and 30 on the back of the handle, and usually colour coded) if possible. A temporary fix is to wrap the prongs together with a piece of tinfoil or with very fine wire where the prongs emerge from the handle.
Checking the brake pedal switch is…a pain. You have to lie over the doorsill on your back and, armed with a torch and double-jointed elbows, peer and rummage behind the dashboard to the top of the sprung brake pedal lever to find and test the switch plunger that the pedal lever either holds “off” or releases “on”. Unless a self-fix is your only hope, call an auto electrician.
Because much of the wiring between the fuse boxes and the back of a car is concealed, a multi-tester is essential for diagnosing a break. Bear in mind that some circuits are wired through the ignition, so the ignition must be turned on. Test between the bare end of each wire to the nearest earth (eg unpainted bodywork or bolt).