ABC of soil sampling for capsicum planting

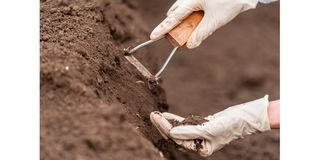
A technician collects a soil sample in a greenhouse.
What you need to know:
- Informative soil testing helps in improving on-farm nutrient efficiency, leading to increased return on investment for fertiliser and lime application and decreases the risk of off-site nutrient movement due to leaching or soil erosion.
Farmer Grace is in the process of preparing the greenhouse for transplanting capsicum seedlings.
She will be planting the seedlings directly in the soil thus there is need to understand the nutrients available particularly because this is a newly constructed greenhouse.
Crop yields are normally determined by various factors such as the nutrients available, soil moisture content and presence of pests and diseases.
In this article, we shall focus on soil sampling and nutrients.
Soil sampling refers to the process of collecting a sample to represent a block of land for testing to determine the nutrients or pathogens available.
On the other hand, soil nutrients refer to elements in the soil required for plant growth which play a critical factor in determining the success of crop growth.
A farmer needs to conduct soil testing as this helps in identifying the specific nutrients available in the soil and indicates the nutrients, which are missing or in excess.
Soil testing is important as it helps in determining the favourable fertiliser plan to maximise production.
Informative soil testing helps in improving on-farm nutrient efficiency, leading to increased return on investment for fertiliser and lime application and decreases the risk of off-site nutrient movement due to leaching or soil erosion.
There are different methods of collecting the soil for sampling. They include random, zigzag and transverse. Reliable soil testing relies on proper soil sampling, by collecting soil at the right depth and the correct place to represent the entire block.
Handling samples
While collecting the sample, be orderly as proper handling of the soil simplifies the collection process and minimises the chance of human errors such as mislabeling or the misplacing of the soil sample.
Gather all the required tools for soil sampling, which include the soil auger for scooping the soil, packaging materials, and a bucket for collecting and mixing.
It is important to ensure the soil is collected at a uniform depth and in the same manner for each sample to maintain consistency.
Avoid collecting the soil along the pathways, or in areas where manure had initially been placed.
Depending on the method identified, collect the soil about 30cm deep and from different points and mix it well in a bucket. If the soil is excessively wet, allow it to dry slightly by spreading a thin layer on a flat surface like a table.
One should not dry the soil sample in an oven or microwave as excessive heat can damage the sample and alter laboratory results.
Once the soil is collected, it should be packed in a khaki bag that is well-labelled with the farmer’s details such as the date of collection, the previous crops planted, and the crop the farmer intends to grow in the next season.
There are several organisations, both private and public, that do soil analysis. The collected soil should be delivered to the laboratory as soon as possible for analysis.
Farmer Grace this week collected the samples and delivered them to the laboratory.
Depending on the laboratory, it takes approximately seven days for the results to be out.
In our next article, we shall look at the results and develop a fertiliser programme to be used.


